SGI O2 Overclocking: from R10K to R12K
Introduction

As a fan of SGI machines, I am lucky enough to own what I consider one of the prettiest Unix workstations ever made, the SGI O2.
Small, not power-hungry, with well-designed hardware and relatively capable for a machine that was Silicon Graphics’ entry-level offering, it sold rather well and is still easy to find today, provided you are willing to pay the price…
With the second-hand market being what it is, the nicest and fastest models, those from the end of production, and the rarest, since they sold the least, sometimes change hands for exorbitant prices.
But all hope is not lost for the poor penniless geek.
A new hope
When you lack CPU power, several options are available. Buy a new, more powerful CPU, but usually an expensive one. Or else tempt fate by pushing the one you have to its limits (notably by a brutal increase of its frequency).
In the case of the O2, a third option is possible: recycling.
Take old and cheap, make it
newless old.What I suggest, quite simply, is to turn an O2 R10K 225/250 MHz into an O2 R12K 300 MHz for the price of an Octane CPU module, which today can be found very easily and for next to nothing.
Interested? Well then, let’s go.
The O2 strike back
The first thing to do before setting off to conquer the universe is to make sure you have the right foundations.
We will only be concerned here with the quest for ultimate power. If your O2 is armed with only an R5K processor, you will still have to invest a minimum. If money is really short, you will have to forget your dreams of power, unless moving from an R5K 180 MHz to an R5K 200 MHz is enough to satisfy you (see here).
What you need:
- An O2 with an R10K225 or R10K250 processor
- An Octane R12K270 or R12K300 CPU module
- A Phillips screwdriver, not too big and not too small
- A 5 mm Allen key
- Something to solder with tin
- Good eyesight and steady hands
As for the processors, they can be found fairly easily on the various sales sites. The tools are very ordinary. As for the last point, if you have trouble, I am afraid you will have to call on your loyal Wookiee.
Now that we have the hardware, let’s move on to a bit of theory.
Knowledge is power
It was while browsing the nekochan forum that I one day discovered that an R12K processor could be used on an O2 R10K CPU module.
Indeed, except for the R12K 400 MHz, the O2 R10/12K processors are not soldered to their boards, but simply held in a slot by the heatsink.
Even better, there is perfect pin compatibility between the 225 and 250 MHz generation R10Ks and the 270 and 300 MHz R12Ks.
This therefore means that an R12K processor, taken for example from an Octane CPU module, can be placed in an O2 CPU module originally intended for an R10K. If that isn’t beautiful.
The only problem is that our poor R12K CPU will then end up at the same frequency as its predecessor.
We will therefore have to bring it back to its real frequency by modifying the characteristics of the CPU board.
Depending on the case, we will have to play with 2 values:
- A multiplier coefficient (MC)
- The SysClock frequency
Indeed, the processor frequency is calculated with a simple formula: SysClock * MC.
A few examples to make this clear:
CPU Type CPU Freq CM SysClock R10K 225 MHz 2.5 90 MHz R10K 250 MHz 2.5 100 MHz R12K 270 MHz 3 90 MHz R12K 300 MHz 3 100 MHz This table clearly shows one thing: the operation will not be the same depending on the starting and target processor modules.
In one case, it will be enough to change the coefficient; in the other, the SysClock will also have to be overclocked.
Welcome in the real world
Changing the coefficient
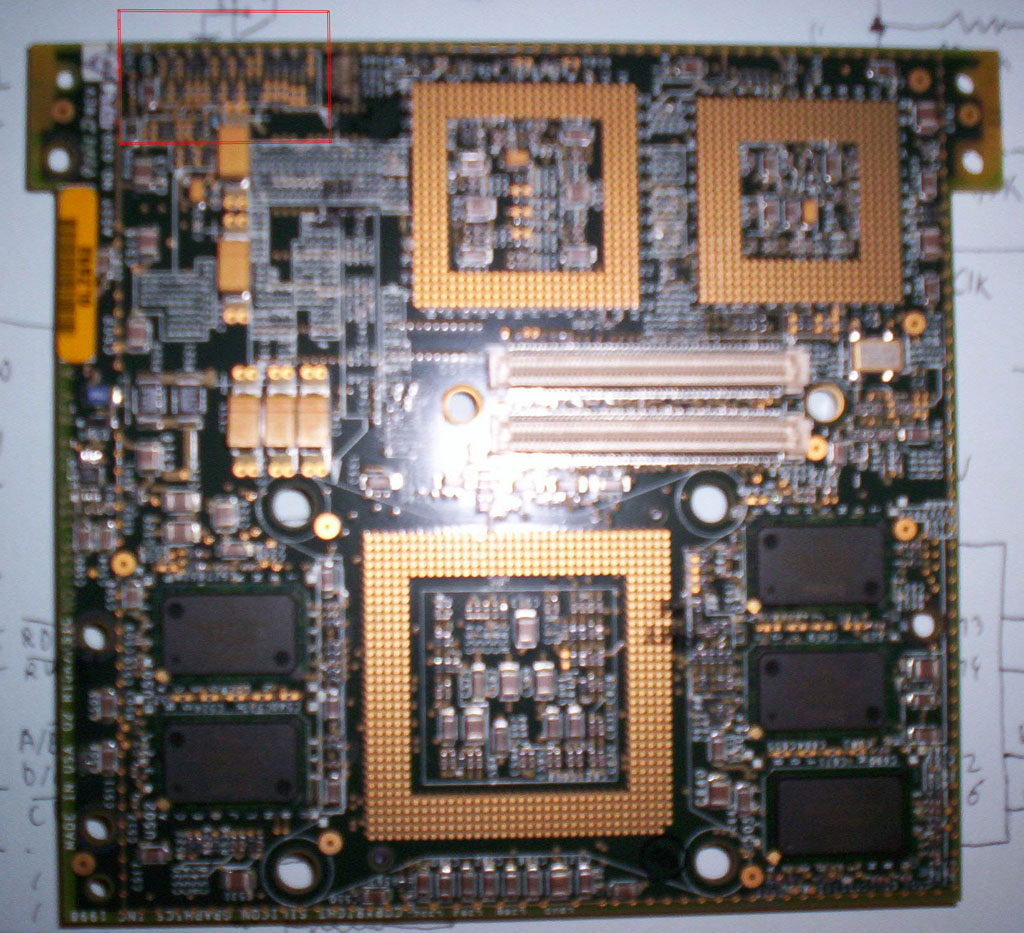
 This operation is the simplest. The value of the coefficient is
determined by the position of resistors at one end of the CPU board (see
the red box in the image).
This operation is the simplest. The value of the coefficient is
determined by the position of resistors at one end of the CPU board (see
the red box in the image).To go from 2.5 to 3, 2 of them have to be moved.
Here is a list of the resistors on 2 CPU modules with different multiplier coefficients:
O2 R10K 225 MHz
R508
           R510
R514
           R517
           R523
           R530
R534
           R537
R540
           R541
R544
R547
           R548
           R550
           R552
           R554
           R556
R559
O2 R12K 270 MHz
R508
           R510
R514
           R517
           R523
           R530
R534
R538
R540
           R541
R544
R547
           R548
           R550
R553
           R554
           R556
R559
The 2 resistors to be changed can clearly be seen here. They have to be moved from R537 to R538 and from R552 to R553.
Changing the SysClock
Here too, the SysClock frequency can be changed from 90 MHz to 100 MHz simply by moving 2 resistors.
The operation is just made trickier by their position on the board, which makes them harder to handle.
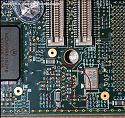
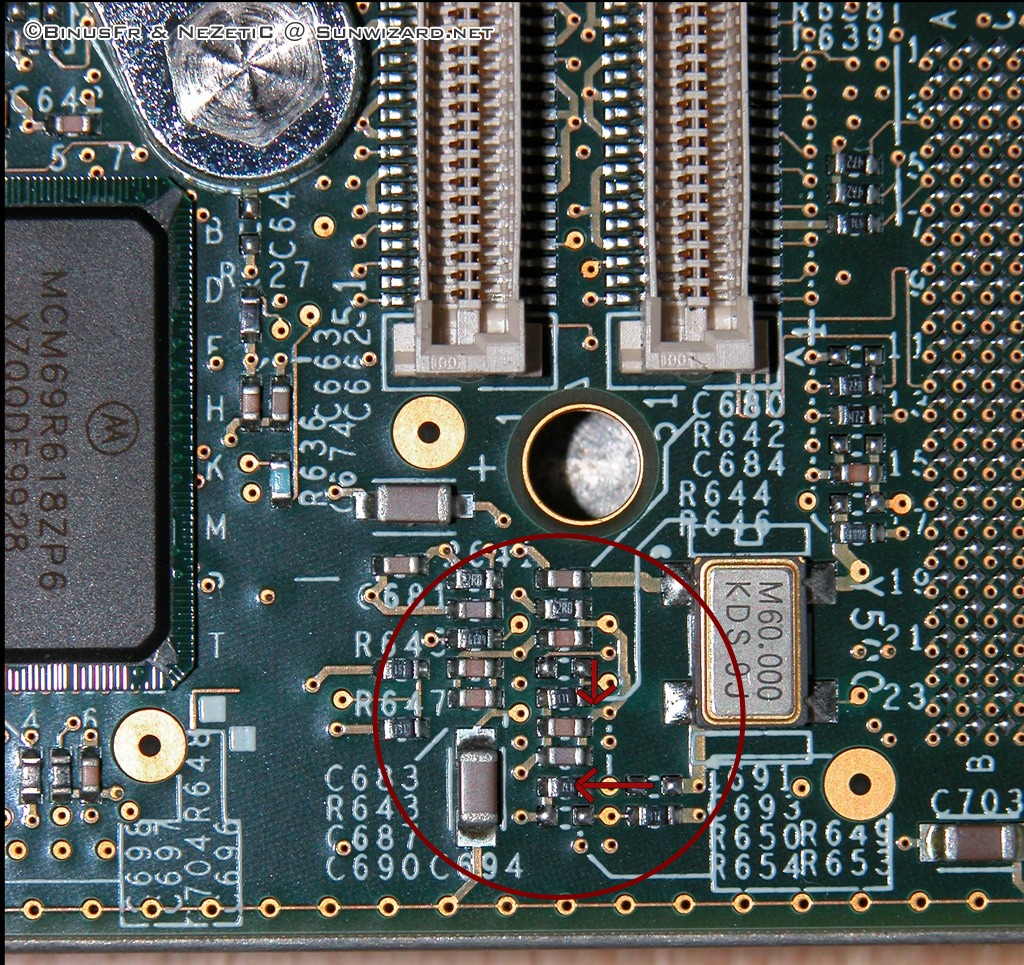
In the course of my tinkering, I noticed that SGI had changed the name of these resistors between 2 generations of CPU boards.Rather than giving only names, a member of Sunwizard.net kindly provided me with a high-resolution photo of the board, from which I made the diagram opposite.
It shows the resistors in the final position (SysClock at 100 MHz, therefore), with the modification made highlighted by arrows (on this board, they were moved from R644 to R646 and from R649 to R650).
I’m your father
To move from theory to practice, a few recommendations are in order.
A CPU board like the O2’s is very sensitive to electrostatic discharges.
So you must be very careful when handling it, avoid putting your fingers on the components and take care to discharge yourself to ground (via a power outlet, for example) if you do not have an anti-static wrist strap.
Moreover, when removing the heatsinks from the modules, small metal particles sometimes come loose at the springs. Be very careful not to leave any lying on the board.
Finally, you do not handle SMD components the way you resolder aunt Jeannine’s toaster power supply. They are very small and require dexterity and proper equipment to handle. If you do not know how to solder properly and check the contacts, do not attempt the operation alone at the risk of breaking everything.
In any case, I would in no way be responsible if a CPU module refuses to work after the operation.
Just a little hack
What remains now is to detail a little how to carry out the operation.
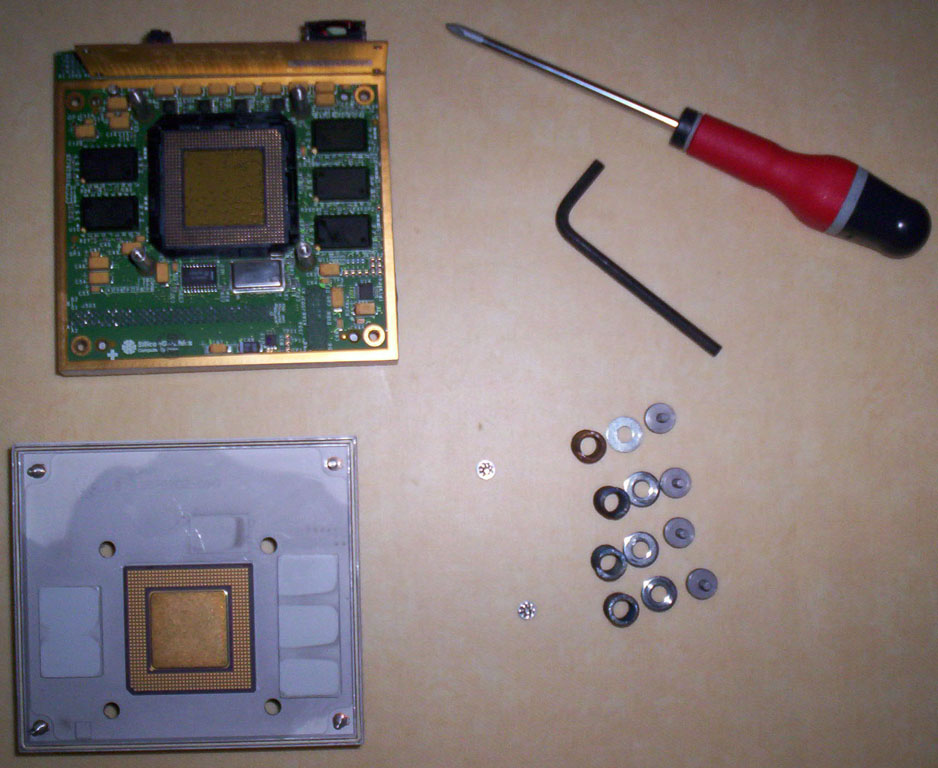
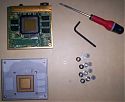 We will start by removing the CPU module from the Octane, in order to
recover the R12K slumbering inside it. To do this, simply unscrew the 2
small screws on the side of the module, as well as the brackets if they
are still present underneath it, with a screwdriver. Then it will be the
turn of the 4 large screws holding the heatsink, with the help of the
Allen key. After carefully removing it, the processor will be clearly
visible on its socket, except, and here be careful, when it stays
glued to the heatsink by the thermal paste!
We will start by removing the CPU module from the Octane, in order to
recover the R12K slumbering inside it. To do this, simply unscrew the 2
small screws on the side of the module, as well as the brackets if they
are still present underneath it, with a screwdriver. Then it will be the
turn of the 4 large screws holding the heatsink, with the help of the
Allen key. After carefully removing it, the processor will be clearly
visible on its socket, except, and here be careful, when it stays
glued to the heatsink by the thermal paste!We will then tackle the O2. The first thing to do is to remove the PCI card bracket. To do this, the simplest (and quickest) way is to remove 3 screws from the front, the 2 holding the bracket, as well as the one just below it holding a black blanking plate, so that the plastic can be bent a little to make room for the bracket.
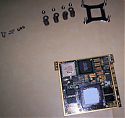 We then have access to the processor module. To extract it, simply
unscrew the 4 small shiny screws at its ends, then pull on it carefully.
We then have access to the processor module. To extract it, simply
unscrew the 4 small shiny screws at its ends, then pull on it carefully.As on the Octane module, the 4 large heatsink screws remain to be unscrewed with the Allen key, and the R10K processor is accessible.
All that is left is to swap the 2 processors while respecting the keying, and to carefully put the heatsink back in place.
At this stage of the operation, we have a functional O2 R12K CPU module, but with the wrong frequency.
Now that the heatsink is in place, put the module on it, and carry out the resistor modifications that are necessary for you.
Finally, put everything back together, taking great care to check that nothing has been forgotten.
A new born
On the next boot, if everything went well, this is what you get:
CPU: MIPS R12000 Processor Chip Revision: 2.3
FPU: MIPS R12010 Floating Point Chip Revision: 0.0
1 300 MHZ IP32 Processor
Main memory size: 1024 Mbytes
Even though it is risky, this CPU module trick is really worth it, since in the end you get, for a reduced price, an R12K module with the same technical characteristics as the one sold by SGI.
Performance is therefore there.
Before:
CPU: MIPS R5000 300 MHZ Dhrystones : VAX MIPS rating = 379.343 Linpack : Unrolled Double Precision 44572 Kflops Whetstone : MWIPS 392.908Now:
CPU: MIPS R12000 300 MHZ
Dhrystones : VAX MIPS rating =    594.373
Linpack : Unrolled Double  Precision 120207 Kflops
Whetstone : MWIPS  732.340
All for around forty euros in my case (having already an Octane CPU module at hand, I only bought an R10K225 motherboard for the O2).
That’s it; all that remains is for me to wish good luck to those who attempt the trick.
A few links
forums.nekochan.net/viewtopic.php?f=3&t=2348&start=30
www.sunwizard.net/forum/viewtopic.php?t=2022
www.sunwizard.net/forum/viewtopic.php?t=2052Acknowledgements
Thanks to chicago-joe, member of Nekochan, great revered master of SGI tinkering, without whom none of this would have been possible.
Thanks also to BinusFr, member of Sunwizard, for taking apart his O2 just for a few photosby Cédric TESSIER on